The joystick mapping is used to transform the raw digital and analog values that PPJoy reads from a joystick into button presses, axis movements and POV direction.
A button press can be mapped in the following ways:
An axis can be mapped in the following ways:
PPJoy allows you change the number of buttons and axes and POV hats reported for a joystick. By default only the virtual joystick and PSX controllers have a POV hat defined.
Changing the button and axis mapping of a joystick

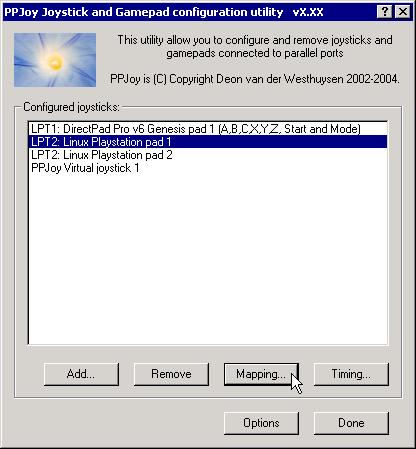
Start by selecting the joystick to change and click on the Mapping... button.. A new dialog box, similar to the one below, should appear.
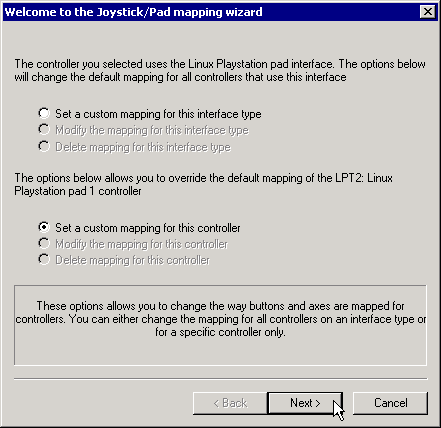
Broadly there are two groups of options: the interface (top three) and individual (bottom three) options. If no mapping exists for a given category (interface or individual) you are offered the chance to create a mapping; else you have to option to modify or delete the mapping. See the section Deleting a mapping for more information on how to delete a joystick mapping.
The interface mapping will affect all controllers using that interface type unless the controller has its own individual mapping. Individual mappings will always take precedence over interface mappings.
If you choose a Set (Create) or Modify option and click on Next you will see the screen below.
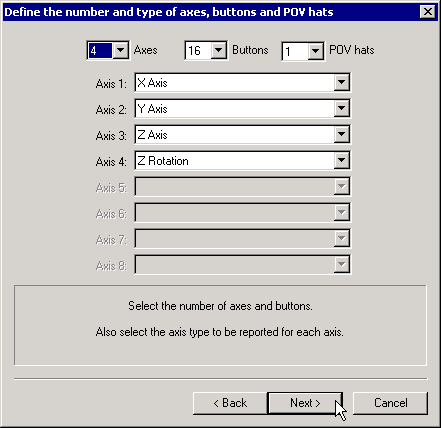
This screen will show you the number of buttons, axes and hats that PPJoy will report to Windows for this device. It will also show you the HID types reported for the axes. You can change the number of axes, buttons and hats reported to DirectX as well as their types. Older verions of DirectX does not like this and will cause DrWatson errors in the Game Controllers Control Panel and possibly other applications as well. Changing these values with DirectX 9 installed on Windows XP seems to work fine.
Click on Next to continue.
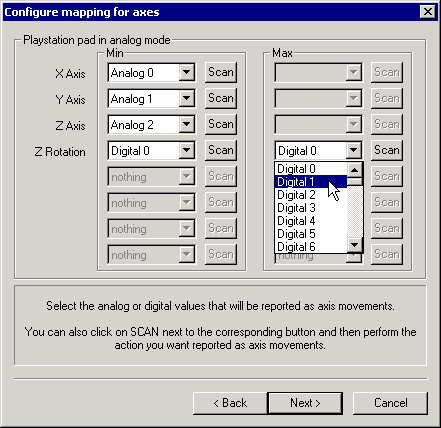
This screen will allow you to change the mapping for each axis. Note that playstation pads have two mapping modes - digital and analog mode. After configuring the mapping for digital mode you will be shown the same screens to configure the mapping for analog mode. Currently all other devices only have a single mapping mode.
An axis can be mapped in one of the following ways:
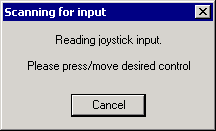
Now press the button, or move the control in the minimum (up, left) direction, that you want to map to this axis. As soon as PPJoy senses any button press or axis movement on the selected device it will close the scan dialog and update the mapping page. (If a button is pressed, or an axis moved, before clicking on the scan button the mapping page will immediately be updated; and the scan dialog will not appear.)
When an analog value is selected in the Min column for an axis the Max column for that axis will be greyed out. This is because a single analog value completely defines an axis. When a digital value is entered in the axis minimum column another digital value must be specified in the maximum column for that axis.
Most interfaces will report the following values for up, down, left and right:
When all the axis mappings are configured, click on Next. This takes you to the button mapping page.
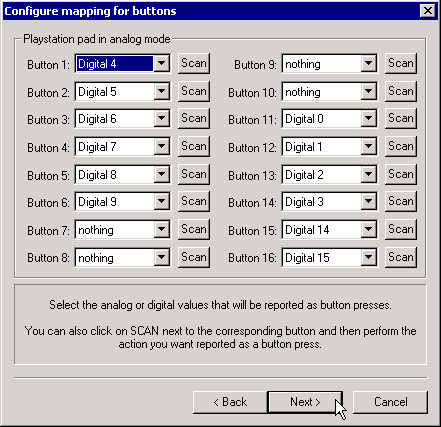
The button mapping page operates similar to the axis mapping page. A button can be mapped in the following ways:
The scan button operates the same as it does on the axis mapping page.
Click on Next when you configured all the buttons. If the device has more than 16 buttons you will be shown the button mapping page again, this time for buttons 17 to (possibly) 32; otherwise you will proceed to the POV hat mapping page. If there is no POV hat defined for the device this page is skipped.
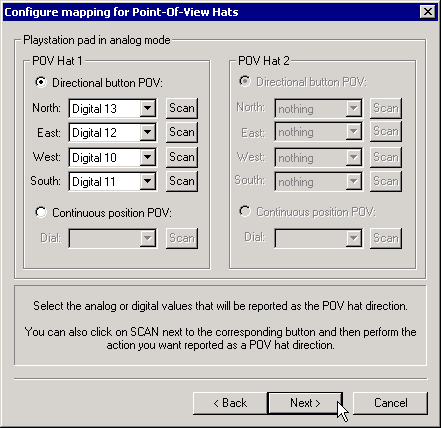
If you select a directional button POV you must provide a mapping for 4 buttons. The mapping for these direction buttons works exactly like the mapping of (fire) buttons on the previous page.
For a continuous position POV you must provide an analog input for the POV - you cannot use any digital inputs here. Just like for axes you can use the analog value in its normal and reversed senses. Take note that very few devices provides analog inputs.
If this device has more than one configuration (like playstation pads) the Next button will take you to the axis mapping page for the next mapping. After you have finished configuring the POV hats for the last mapping mode you will be moved on to the finish screen.
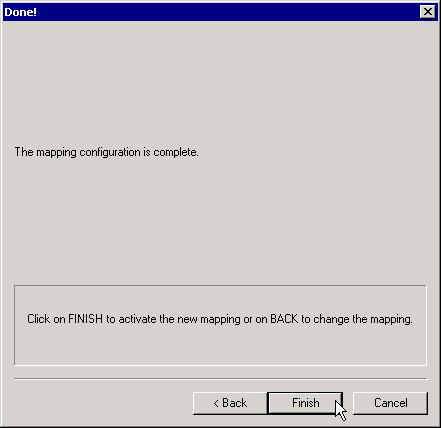
This screen confirms that the mapping is complete. It is also your last chance to cancel without writing the mapping to the joystick driver. Click on Finish to write the new mapping to the driver.

Start by selecting a joystick and clicking on the Mapping... button.
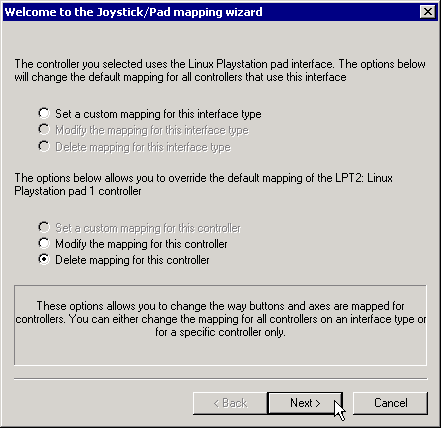
Select whether you want to delete the individual mapping for a joystick or the interface mapping. Then click on Next. If a mapping does not exist the option to delete it will be greyed out.
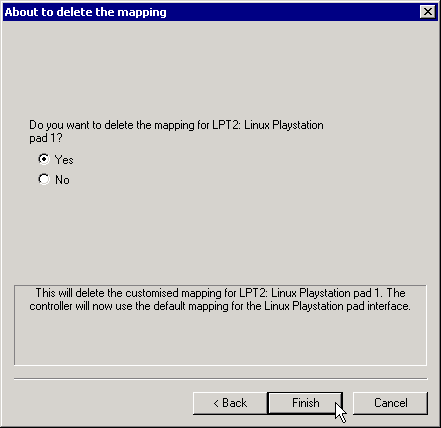
This is the confirmation screen before the delete. You have to select Yes before the Finish button will be activated. After you selected Yes, click on Finish.